After installing RHEL/CentOS 7 minimal, You may not able to connect network in that machine. This will happen because Ethernet interfaces are not enabled by default.
This guide explain you to setup network on RHEL/CentOS 7.
Setup network on CentOS 7 minimal
First, type “nmcli d” command in your terminal for quick list ethernet card installed on your machine:
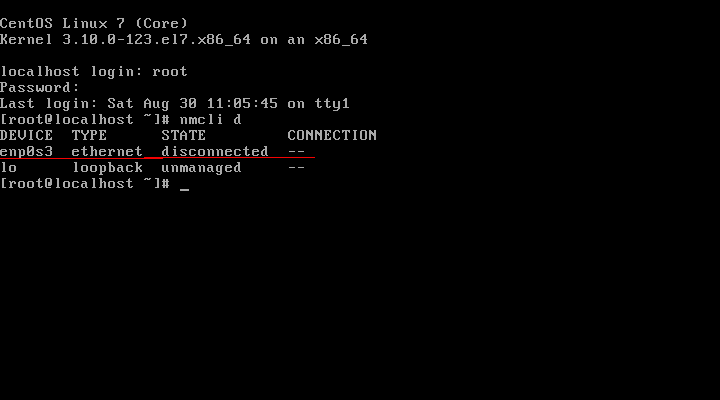
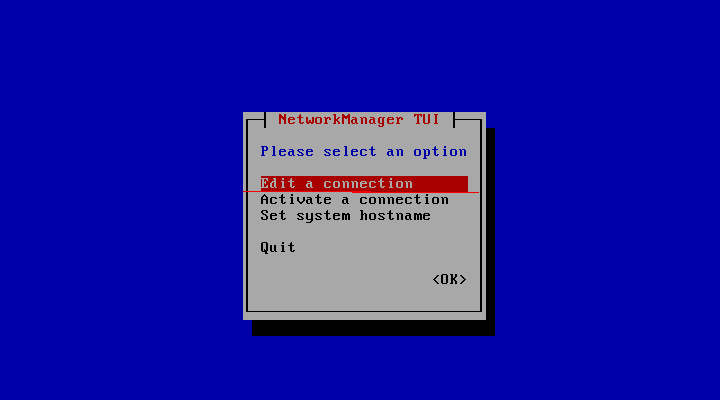
Type “nmtui” command in your terminal to open Network manager. After opening Network manager chose “Edit connection” and press Enter (Use TAB button for choosing options).
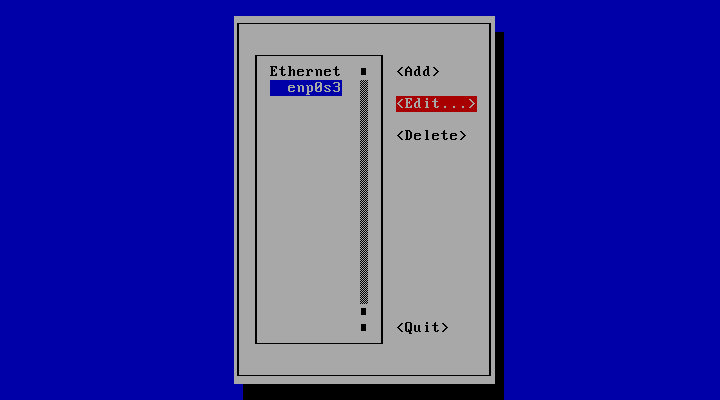
Now choose you network interfaces and click “Edit”
[ads1]
DHCP configuration
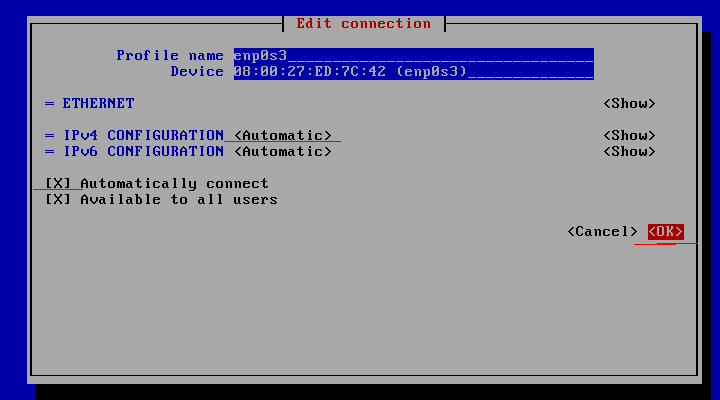
Choose “Automatic” in IPv4 CONFIGURATION and check Automatically connect check box and press OK and quit from Network manager.
Reset network services:
service network restart
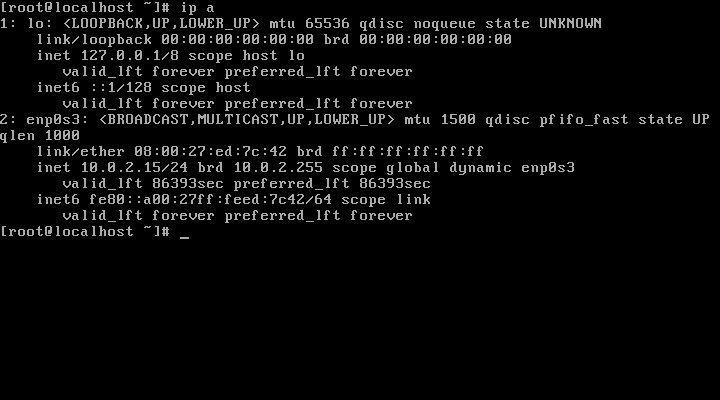
Now your server will get IP Address from DHCP .
If you want to set a static IP address see How to configure static ip address on CentOS 7.
[ads]
[box type=”note” align=”” class=”” width=””]See also:
- Howto install ifconfig on CentOS 7 Linux
- 15 ip Command Examples for Linux Users
- Setup network on Ubuntu 18.04
[/box]
Hi, these information is very useful. Thank you very much
tnx!
Activate network after install:
1. Edit /etc/sysconfig/network-scripts/ifcfg-eth0
ONBOOT=yes
2.
Look for easyrsh app og google play quick reference guide for Solaris, HPUX, Redhat OSs
this is the solution if you can not use nmtui tool, for example in Fedora 22
Thanks
this solution is without nmtui tool. nice one.
Thanks!
Hi, guys. I can’t see any available Ethernet after I open nmtui as attached. I have to add a new Ethernet connection every time I create a new VM, and I have to hard code the MAC address to the new Ethernet connection I have created.
Does anyone know is there a way to detect the connection automatically after I deploy a new VM?
Thank you in advance.
Hi,I also meet this problem and can’t see any avaiable Ethernet after use “nmcli d”,so how to do? Can you send solutions to my email:bingliang711@hotmail.com
Thanks!
First, verify the status of Network Manager service
# systemctl status NetworkManager.service
To check which network interface is managed by Network Manager,
type:
# nmcli dev status
I hope I helped you
thanks! this one works for me. I am using Centos 7 in VMware
Hi, how to setup wireless after install centos7
NetworkManager is still an abomination in my eyes for most uses, but for a workstation I get it.. otherwise NM_CONTROLLED=n is my friend.
For a minimal install, why would you ever use networkmanager? Is it now forced in 7? If not, I would never, ever, use networkmanager on a server. It’s only real use is for mobile devices that hop around wireless networks all the time.
In 6, I would use system-config-network-tui
Thank you so much….. very helpful.
Thanks so much man!
It Worked for me, Thanks Mate 🙂
How can I get device address(00:…)?
ip addr is for the minimal version of CentOS and ifconfig for any normal distro
I am stuck in a silly thing but not sure how to solve it. To enable “Automarically Connect” checkbox, I am clicking in ENTER button and I am not getting “X”. How can I enable it?
Type following command:
# vi /etc/sysconfig/network-scripts/ifcfg-enp0s3
and change on ONBOOT=no to ONBOOT=yes
Worked. Thanks
still i can’t enable ‘Automatically connet ‘ checkbox can you please help me out
for anyone else stuck on this – hit space instead of enter
Open Settings > Network & Internet.
Click Wi-Fi.
In the right pane, click Change adapter options.
Double-click Wi-Fi to open Wi-Fi Status.
Double-click Wireless Properties.
Uncheck Connect automatically when this network is in range.
Click OK, and then Close.
Fantastic! Thank you very much for this helpful article – just what I needed and it worked.
It works for me. Thanks!
no-nonsense guide. I like it. Thank you
hello, i recently instlled centos7 but i have just LO interface,not eth0!! please could you help me!! tanks
may be the ip is down state…..once use this command #ifup eth0
here eth0 is default interface.once try friend
Hi,
How do I connect via wifi? It says it’s unmanaged. I’m real new to Linux ( Centos 7). Thanks for all of your help.
thanks. It helped
Thanks a lot! Save my day.
Thanks so much. It is useful
Thanks for posting this very helpful info!
Excellent Info.
Thank man…helped a lot…..
Great guide, thanks for the help.
Thank you vey much.. A great guide..
Thanks. Perfectly described! Works like a charm.
great illustrations and it works as described – thank you very much
This was a big help. Thanks!
Thank you sir. Very useful information
I wish it was available on RHEL6 but it isn’t.
One of the best tutorial, thanks mate
I did not have to restart service to get ip addr
Very straight forward and easy. After mucking around for about an hour, this help me complete in within minutes. Is there any chance you help me one on one? Many thanks
I’ll be glad if I can help.
Big thx for you…you save my time
Excellent. I thought Virtualbox would create this interface if you set it to bridged networking. But it did not. So I used nmtui add/manual and entered gateway and 192.* ip address and I could connect to CentOS from the host machine.
thanks alot this worked for me.
This is very useful. Thank you.
Great…that helped me a lot.
Although on my CentOS 7 Network manager was not running out of the but…..please add in your guide to start it 😉
Thank You very much
wow, works perfectly. configured networking with these commands.
hi, and if centos 7 64 minimal not detect any network card, what should i do ?
thank you for the steps.
bang on target!
Thanks, very clear!
Thank man, you hit at right point. I wasted so much time by going on to those useless links. But your solution worked like a charm.
Thanks again!
Thank you, worked like a charm. Great share.
Thank you! This info helped!
Hi, thanks a lot, you saved my life.
Thank you!
Thanks for the info, i ready set my configuration and the server is ready. Now is time to set a static IP
Hi,
I installed CentOS 7 32 bit on my HP DV8000 laptop. Wireless connection is working fine but wired connection is not activated. In NetworkManager app even wired tab is disabled.
# nmcli d
DEVICE TYPE STATE CONNECTION
wlp6s0 wifi connected HKNS-WIRELESS-2
lo loopback unmanaged —
No wired device is visible.
# lspci |grep -i net
06:00.0 Network controller: Intel Corporation PRO/Wireless 3945ABG [Golan] Network Connection (rev 02)
08:08.0 Ethernet controller: Intel Corporation PRO/100 VE Network Connection (rev 01)
# lspci -nn -k |fgrep -i ether
08:08.0 Ethernet controller [0200]: Intel Corporation PRO/100 VE Network Connection [8086:1092] (rev 01)
How can I install the driver and activate the wired network adapter? Please help. Thanks in advance!
Hey Krishna,
Did you able to solve this issue? I am having the same problem. Please let me know if you have a solution.
Thank you in advance,
-Sunil
Thanks, finally after two days, my vm got IP address
My CentOS VM keeps dropping offline. Sometimes like clock work, 9 ping request timeouts and at times completely randomly goes up and down.
I have disabled the firewall so that’s not it.
The nic is also configured for “keep alive”
I have already allowed SSH and can connect to it when it’s online.
I have read dmesg, /var/log/messages and don’t see anything that makes sense
Here’s the interesting part:1
1. When I restart the network, the connection comes back temporarily
2. The above does not happen if I restarted the firewalld
3. ifup ens192 && ifup ens192 does bring the network back temporarily just like #1
SSH is enabled and root logins are permitted and tested successfully
Perfect instructions!
Thank you so much…
On CentOS 8 (minimal install):
1. Run the command below to make sure the network interface/device is called eth0.
nmcli d
If “eth0” is not the name of your network interface, then replace “eth0” with the name of your interface in part 2 commands
2. If the interface name is eth0, then run (as root) these commands:
ifup eth0
sed -c -i “s/\(ONBOOT *= *\).*/\1yes/” /etc/sysconfig/network-scripts/ifcfg-eth0
systemctl restart NetworkManager.service
Your done!
The first command brings up the network interface. At this point you should be able to ping google.com & connect via ssh
The second command sets the ONBOOT variable to “yes” in the ifcfg-eth0 file so that the interface starts up automatically on boot.
The third command restarts the NetworkManager service.
Great searching too much finally find some geat blog.
How do you reset network services? I have done all of the other steps but do not know where to go to do a service network restart.
Thank you so much for your help.
You are a life saver, thanks.