SHOUTcast is a free, open source and cross-platform software application that can be used to stream media over the Internet. SHOUTcast is specially used for creating or listening to Internet audio broadcasts. SHOUTcast allows us to broadcast a stream of music to the remote client connected to the server.
This tutorial will guide you on how you can install The SHOUTcast Server in Ubuntu 18.04 LTS Server.
Download and Install SHOUTcast Server
First, you will need to download the latest version of the Shoutcast from their official website. You can download it with the following command:
$cd ~
$ wget http://download.nullsoft.com/shoutcast/tools/sc_serv2_linux_x64-latest.tar.gz
Once the download is completed, create a new directory in your home directory and extract the downloaded file inside it:
$ mkdir ~/shoutcast
$ mv sc_serv2_linux_x64-latest.tar.gz shoutcast
$ cd ~/shoutcast
$ tar -xvzf sc_serv2_linux_x64-latest.tar.gz
Next, you will need to create a new configuration file for Shoutcast. You can do this with the following command:
$ nano sc_serv.conf
Add the following lines:
adminpassword=password
password=password1
requirestreamconfigs=1
streamadminpassword_1=password2
streamid_1=1
streampassword_1=password3
streampath_1=http://ServerIP:8000
logfile=logs/sc_serv.log
w3clog=logs/sc_w3c.log
banfile=control/sc_serv.ban
ripfile=control/sc_serv.rip
Change the adminpassword, password, streamadminpassword_1, and streampassword_1 values to safe passwords. The adminpassword is used to access the web interface, the streampassword_1 is the password for access to the stream. Replace ServerIP with your server IP.
Shoutcast is now installed and configured, it’s time to start Shoutcast service and access its web interface.
To start the server execute sc_serv file from your current working directory, which must be the server directory, put it on background with & bash operator and direct your browser to http://ServerIP:8000 URL. Also use netstat command to see if the server is running and on what port numbers it listens.
[ads]
$ chmod +x sc_serv
$ ./sc_serv &
You should see the followingoutput:
rasho@lintut:~/shoutcast$ 2018-12-02 16:46:55   WARN    [CONFIG] Ignoring streampath_1=http://ServerIP:8000 as this will produce an invalid path.
2018-12-02 16:46:55     INFO    *********************************************************************
2018-12-02 16:46:55     INFO    **        SHOUTcast Distributed Network Audio Server (DNAS)        **
2018-12-02 16:46:55     INFO    **    Copyright (C) 2014-2019 Radionomy SA, All Rights Reserved    **
2018-12-02 16:46:55     INFO    *********************************************************************
2018-12-02 16:46:55     INFO    [MAIN] SHOUTcast DNAS/posix(linux x64) v2.6.0.749 (Nov 22 2018)
2018-12-02 16:46:55     INFO    [MAIN] PID: 1429
2018-12-02 16:46:55     INFO    [MAIN] Saving log output to `/home/rasho/shoutcast/logs/sc_serv.log'
2018-12-02 16:46:55     INFO    [MAIN] Automatic log rotation interval: 1 day
2018-12-02 16:46:55     INFO    [MAIN] Loaded config from `/home/rasho/shoutcast/sc_serv.conf'
2018-12-02 16:46:55     INFO    [MAIN] Calculated CPU count is 1 -> 2 CPUs specified to be used
2018-12-02 16:46:55     INFO    [MAIN] Limited to 1024 file descriptors [relates to ulimit -n]
2018-12-02 16:46:55     DEBUG   ident is DIDC53b23b9494334e738db60fbfad0bbad6-8000, DID is c9c2937ca79b6c838d5fc8ac3130215a17c33f2fa28960de9a4e53f9bc5a85
...........
Once the server is started, open your web browser and type the URL http://ipaddress:8000, you will be redirected to the following page:

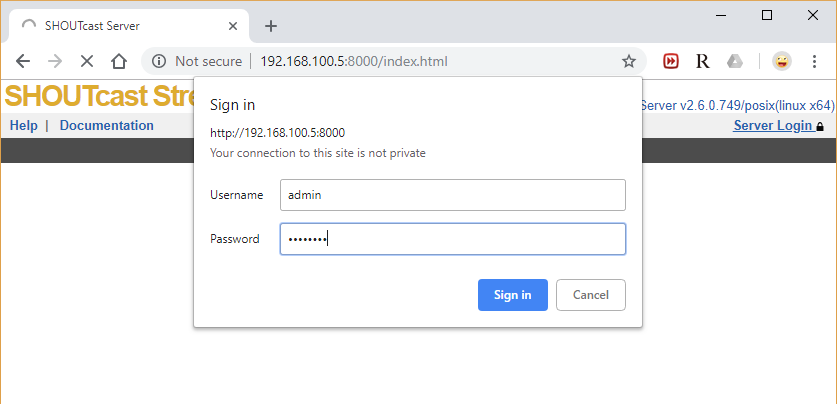
Now, click on Server Login button, you should see the Shoutcast login page as below:

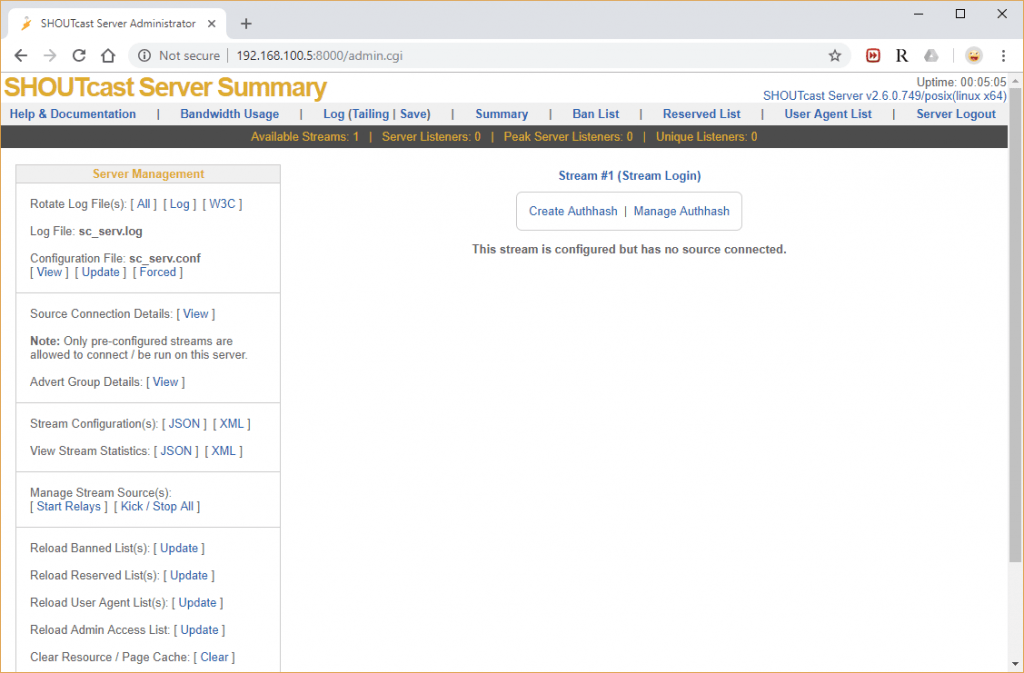
Here, provide your admin username and password which you have specified in the configuration file, then click on the Ok button, you should see the Shoutcast dashboard in the following page:

That is all. You have successfully installed Shoutcast server in Ubuntu 18.04 LTS server.
I would like my SC to start when my server starts. So this will run on a VPS and always be up? How would i go further to do this?