Redis is an open-source in-memory database project implementing a distributed, in-memory key-value store with optional durability. Redis supports different kinds of abstract data structures, such as strings, lists, maps, sets, sorted sets, hyperloglogs, bitmaps and spatial indexes. Redis has built-in replication, Lua scripting, LRU eviction, transactions and different levels of on-disk persistence, and provides high availability via Redis Sentinel and automatic partitioning with Redis Cluster. The project is mainly developed by Salvatore Sanfilippo and is currently sponsored by Redis Labs.
This tutorial explains how to install and configure Redis on an CentOS 7 server.
Prerequisites
Before starting with the tutorial, make sure you are logged in as a user with sudo privileges.
Install Redis on CentOS 7
Redis package is not included in the default CentOS repositories. We will be installing Redis version 5.0.2 from the Remi repository.
The installation is pretty straightforward, just follow the steps below:
Start by enabling the Remi repository by running the following commands in your SSH terminal:
$ sudo yum install epel-release yum-utils
$ sudo yum install http://rpms.remirepo.net/enterprise/remi-release-7.rpm
$ sudo yum-config-manager --enable remi
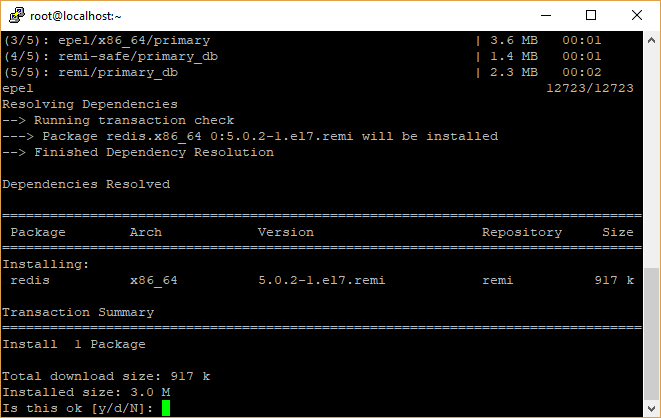
Now, Install the Redis package by typing:
$ sudo yum install redis

[ads]
Once the installation is completed, start the Redis service and enable it to start automatically on boot with:
$ sudo systemctl start redis
$ sudo systemctl enable redis
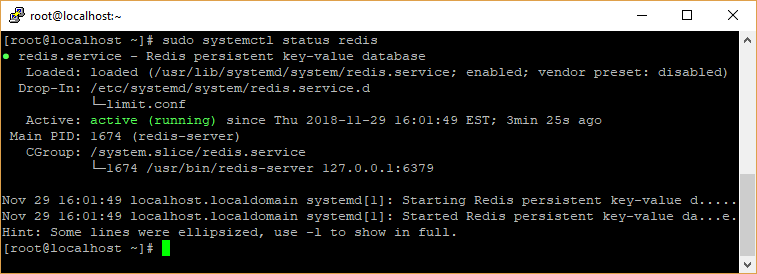
To check the status of the service enter the following command:
$ sudo systemctl status redis

Congratulations, at this point you have Redis installed and running on your CentOS 7 server.
Configure Redis Remote Access
By default, Redis doesn’t allow remote connections. You can connect to the Redis server only from 127.0.0.1 (local host) – the machine where redis is running.
Perform the following steps only if you want to connect to your Redis server from remote hosts. If you are using a single server setup, where the application and redis are running on the same machine then you should not enable remote access.
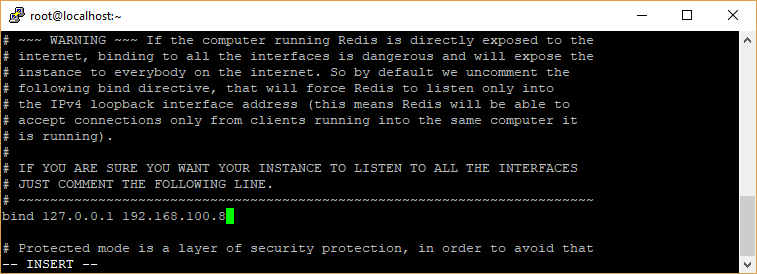
To configure Redis to accept remote connections open the Redis configuration file with your text editor:
sudo vi /etc/redis.conf
Locate the line that begins with bind 127.0.0.1 and add your server private IP address after 127.0.0.1
Make sure you replace 192.168.100.88 with your IP address. Save the file and close the editor.

Restart the Redis service for changes to take effect:
$ sudo systemctl restart redis
Use the following ss command to verify that the Redis server is listening on your private interface on port 6379:
$ ss -an | grep 6379
You should see something like below:
$ ss -an | grep 6379
tcp    LISTEN     0      128    192.168.100.88:6379                  *:*
tcp    LISTEN     0      128    127.0.0.1:6379                  *:*
Now, add the firewalld rules to enable the port to accept the connection:
$ sudo firewall-cmd --new-zone=redis --permanent
$ sudo firewall-cmd --zone=redis --add-port=6379/tcp --permanent
$ sudo firewall-cmd --zone=redis --add-source=192.168.100.0/24 --permanent
$ sudo firewall-cmd --reload
The commands above creates a new zone named redis, opens the port 6379 and allows access from the private network.
At this point Redis server will accept remote connections on TCP port 6379.
Make sure your firewall is configured to accept connections only from trusted IP ranges.
To verify that everything is setup properly, you can try to ping the Redis server from your remote machine using the redis-cli utility which provides a command-line interface to a Redis server:
$ redis-cli -h 192.168.100.88 ping

Redis is now installed, securely configured, and set to launch on boot.