EHCP (Easy Hosting Control Panel) is free and open source web hosting control panel for Ubuntu Based distro, designed for hosting multiple domains on a single machine. It aims to be easy to install and use, simple, and functional. It currently supports for DNS, Apache WebServer, MySQL, FTP, and email configuration.
EHCP Features
- Full php, full opensource, easily modifiable, customazible, ehcp templates
- Unlimited “resellers, panel users, domains, ftp users, emails, mysqls”
- Domains, subdomains, ftp, mysql, dns (automatic), email etc. management
- password protected domains,
- Email forwarding, autoreply, catch-all emails,
- Web-stats (webalizer)
- Web-ftp (net2ftp)
- Easy Install Scripts (scripts easily downloaded and copied by means of server)
- Disk quota control,
- Custom http, custom dns, domain aliases, domain redirect,
- SSL support
- Different languages, templates support, a few lang/templates included,
- Different Menus/pages for Server Admin, Reseller, domain admin, email user (4 level)
- Server backup/restore (files+db)
- Domain transfer to another ehcp user
- Simple, light, fast, host hundreds of domains in it.
In this article we will help you to install and setup Easy Hosting Control Panel on Ubuntu 12.04/12.10/13.04/13.10.
Install EHCP (Easy Hosting Control Panel) on Ubuntu 12.04/12.10/13.04/13.10
First, login to your Ubuntu Server width ssh and download the latest EHCP source package using wget command.
# wget -O ehcp.tgz www.ehcp.net/ehcp_latest.tgz
Extract ehcp.tgz with following commands:
# tar -zxvf ehcp.tgz
Change to ehcp directory, then run install.sh script:
# cd ehcp
# ./install.sh
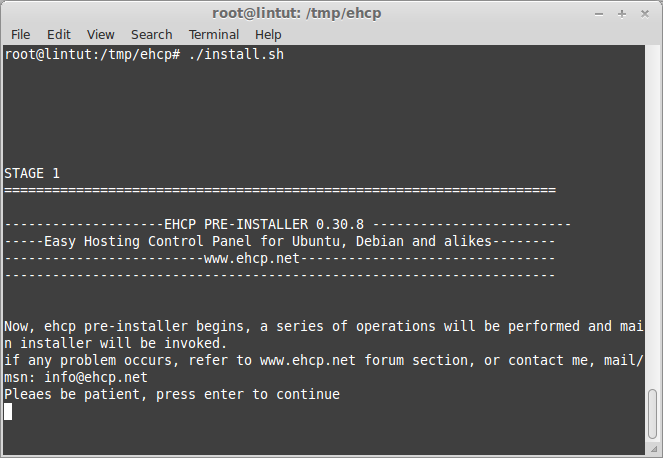
EHCP installation script install all needed packages including Apache, MySQL, PHP, Postfix.
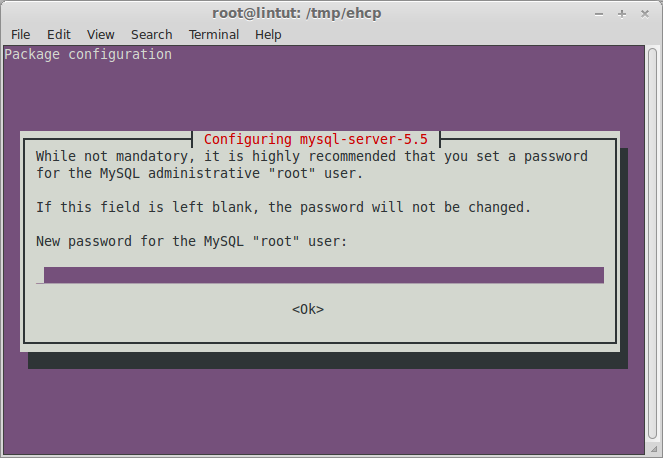
It is highly, recommended you to set a MySQL ‘root‘ password for MySQL administration.
Now select the mail server which one is compatible to you. In my case I select “Internet Site”.

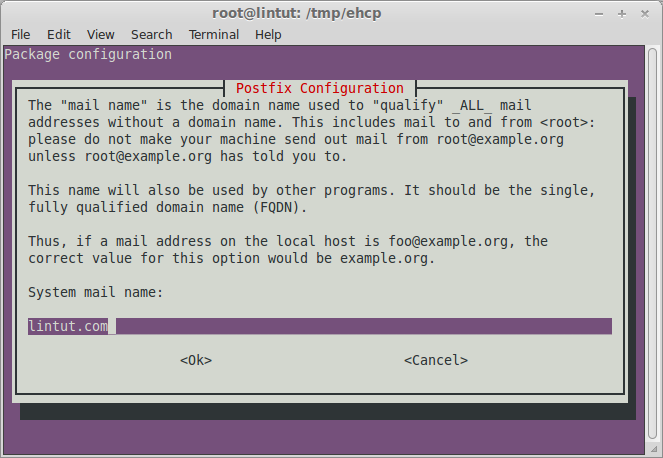
Enter your mail domain name and Click OK.
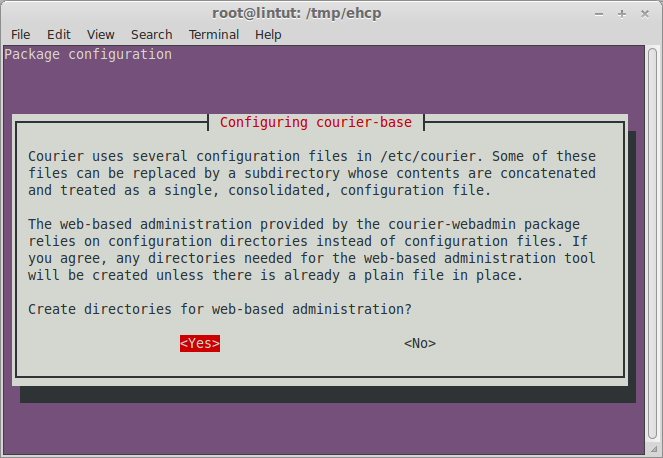
Select ‘Yes’ to create web based directories.
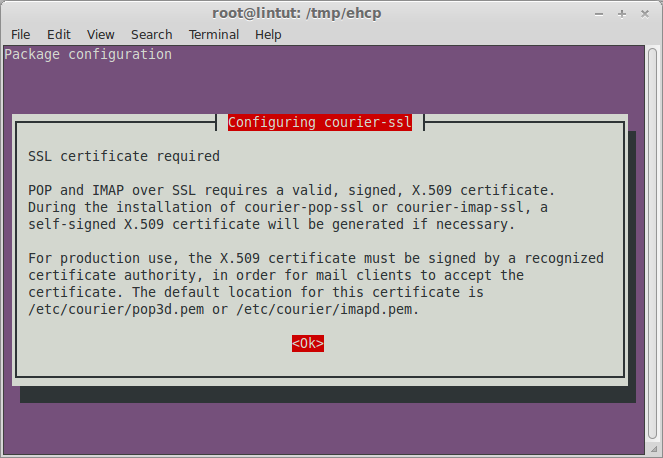
Create SSL certificate for POP and IMAP. Click on ‘Ok‘.

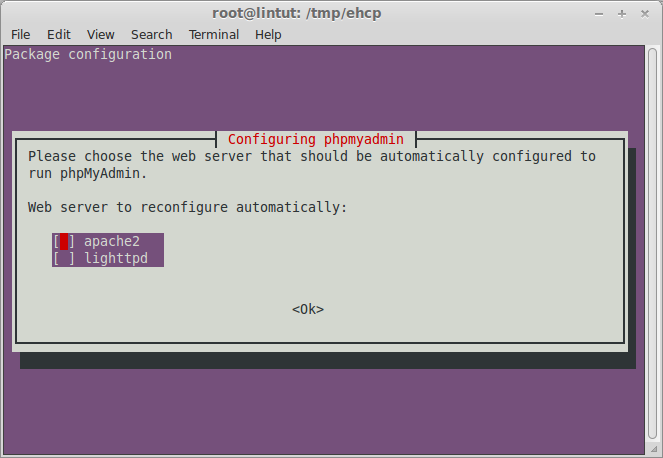
Please choose the web server that should be automatically configured to run phpMyAdmin.
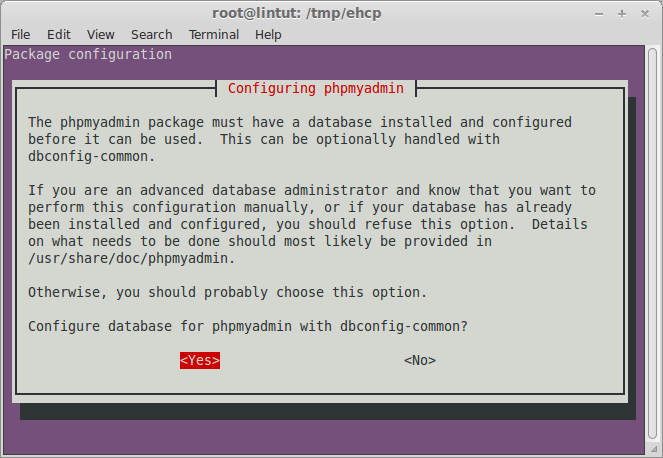
Configure phpMyAdmin database.
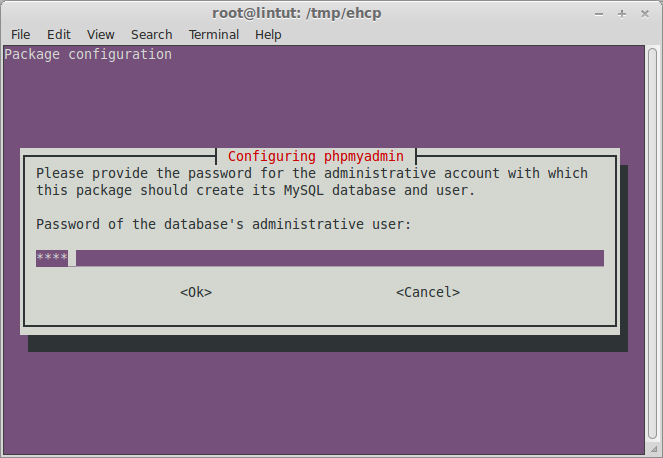
Specify the phpmyadmin database administrative user password.
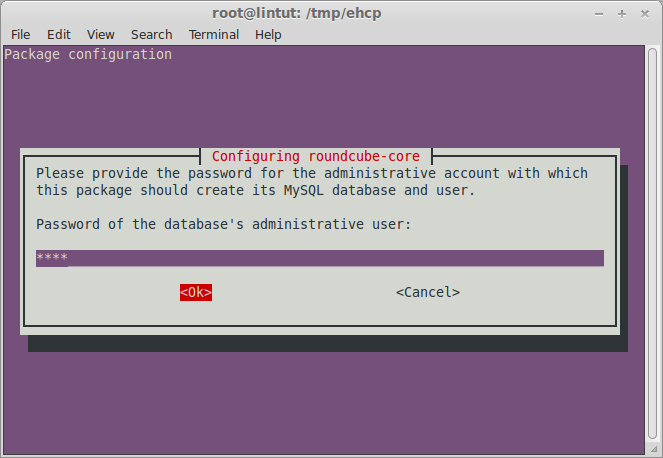
Now configure the roundcube-core.

Please select the database type that used by roundcube.
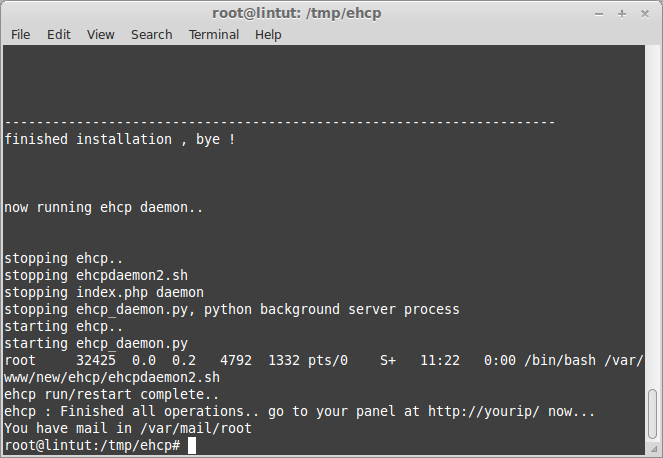
Finished installation
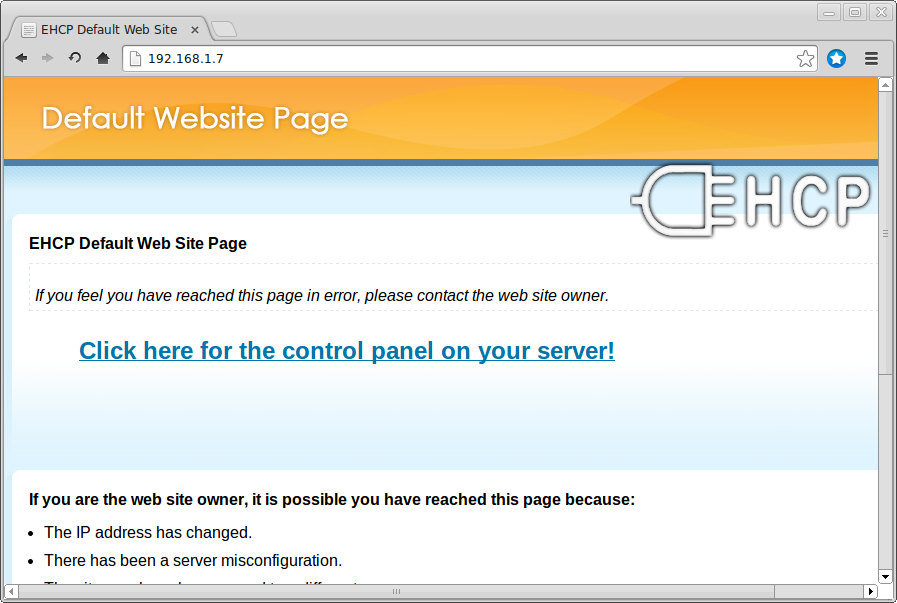
Now, navigate to the Web browser window and enter IP address of your server.
http://youripaddress/
OR
http://localhost
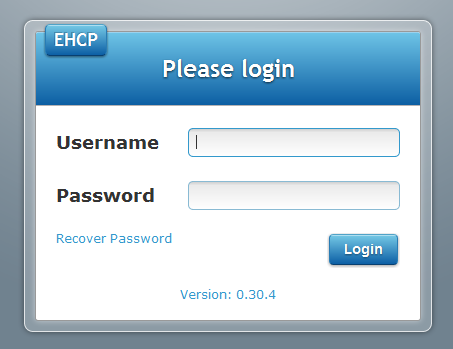
Enter ehcp login details, default admin username is ‘admin‘ and default admin password is ‘1234‘. If you’ve set new admin password during installation enter that password.
That is all
hello, we have a jboss installation on ubuntu. which control panel will work with it?
I have two errors during the instalation, can’t create mysql connection and roundcube database.
In Ubuntu 13.10 clean
How can i solve this?
Thanks.
Thanks, everything works perfect
dang ftp wont work on12.04 is there a fix for Response: libgcc_s.so.1 must be installed for pthread_cancel to work
how to use sap application in ubuntu server and other software
Attempting to install on Ubuntu Server 14.04, clean, and getting the same error as Victor
– ERROR 2002 (HY000): Can’t connect to local MySQL server through socket ‘/var/run/mysqld/mysqld.sock’
I’ve tried both with and without mysql pre-installed.
Any Suggestions?
Check this page http://stackoverflow.com/questions/11657829/error-2002-hy000-cant-connect-to-local-mysql-server-through-socket-var-run . Maybe you can help.
Installation was stuck in Stopping Mysqld