Kloxo-MR is another alternative of free web hosting / server control panel that can be solution for you who don’t want to manually install webserver, MySQL and PHP. The software is basically a fork of original Kloxo CP by LXCenter. The MR part of Kloxo-MR is Mustafa Ramadhan, the one who did the fork, enhance and develop this truly modified version.
The Kloxo-Mr feature set includes:
- Installs on Redhat/CentOS 5, 6, and 7
- Billing support: AWBS, WHMCS, HostBill, TheHostingTool, AccountLab Plus, Blesta, and BoxBilling
- Web server support: Nginx, Nginx-Proxy and Lighttpd-proxy, Hiawatha, Hiawatha-proxy and Httpd 24, Httpd, and Lighttpd
- Dual and multi-web server support
- Webcache server support: Squid, Varnish, and ATS
- Php support: Dual-php with php 5.3/5.4 (primary) and php 5.2 (secondary)
- PHP-type for Apache: php-fpm_worker/_event and fcgid_worker/_event; beside mod_php/_ruid2/_itk and suphp/_worker/_event
- Mail server support: qmail-toaster
- Database support: MySQL or MariaDB
- Database Manager support: PHPMyAdmin, Adminer, MyWebSql, and SqlBuddy
- Webmail support: Afterlogic Webmail Lite, Telaen, Squirrelmail, Roundcube, and Rainloop
- FTP server support: Pure-ftpd
- DNS Server support: Bind, Djbdns, Powerdns, MaraDNS, NSD, myDNS, and Yadifa
- Available addons: ClamAV, Spamassassin/Bogofilter/Spamdyke, RKHunter, and MalDetect
- Free SSL
This is a small tutorial that will help your installation of Kloxo MR7 in a CentOS 7 Server.
HOW TO INSTALL
1. Update your CentOS 7 Server
Before you install Kloxo-Mr, I highly recommend you upgrade your CentOS server. To do this, open up a terminal window and issue the command sudo yum update.
# yum update -y
2. Install the needed packages
First we need to install the necessary dependencies. This is handled with the following commands:
# yum install yum-utils yum-priorities vim-minimal subversion curl zip unzip -y
# yum install telnet wget -y
Make sure SELinux is disabled We have to disable SELinux, cause it not correctly disabled, the Kloxo installation useless and may required to reload OS to re-install it properly.
# setenforce 0
# echo ‘SELINUX=disabled’ > /etc/selinux/config
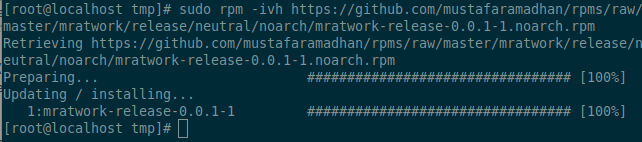
Next change into the /tmp directory:
# cd /tmp
and download the installation script:
# rpm -ivh https://github.com/mustafaramadhan/rpms/raw/master/mratwork/release/neutral/noarch/mratwork-release-0.0.1-1.noarch.rpm
Then go back to upper directory:
# cd /
Remove all cached packages and headers with the command:
# yum clean all
Update the mratwork RPM with the command:
# yum update mratwork-*.
[ads]
3. Install Kloxo-MR
Finally, begin the install process with this command:
# yum install kloxomr7 -y
Once done you’ll see something like this:
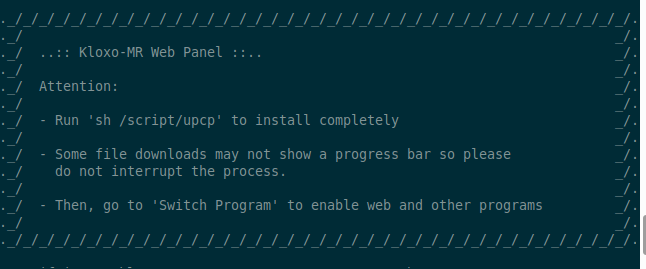
Now the last magic command to issue is:
# sh /script/upcp
That will install everything so the process will be a little bit longer than any previous command above so sit tight and wait till it finished.
And once done you’ll see something like this:
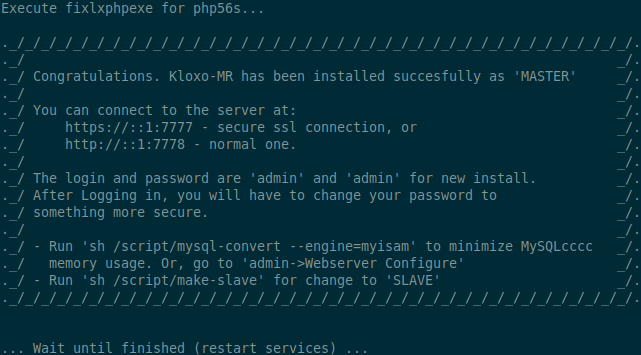
4. Frst time open Kloxo MR web panel page
Now that the installation is complete, point your web browser http://SERVER_IP:7778 or http://SERVER_IP:7778 (where SERVER_IP is the actual IP address of your server).
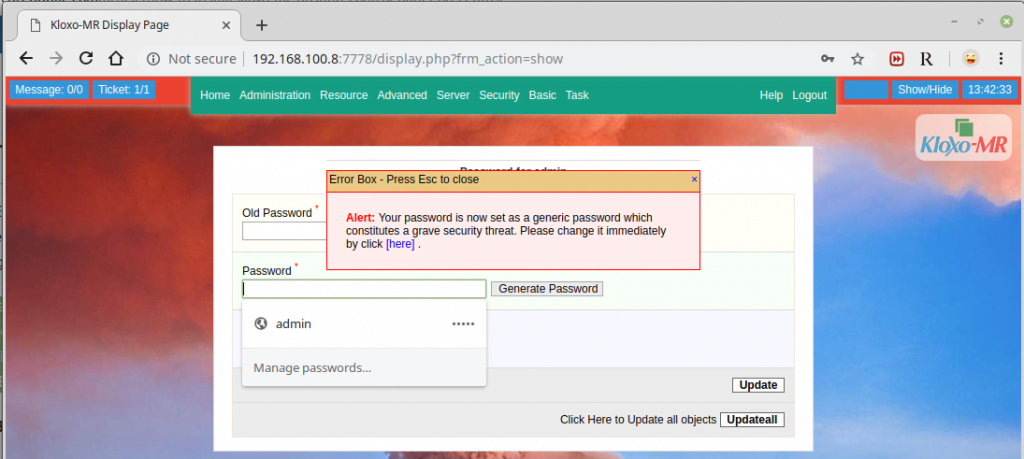
Default username is admin and password is admin.
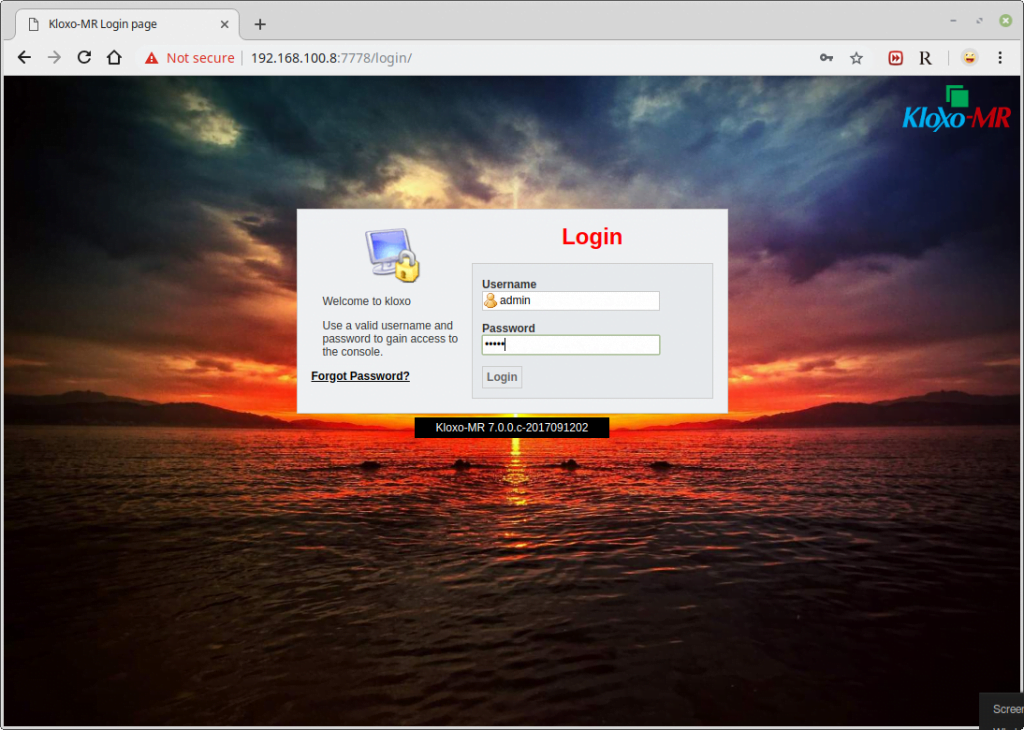
After login, you’ll be prompted to change the admin password.
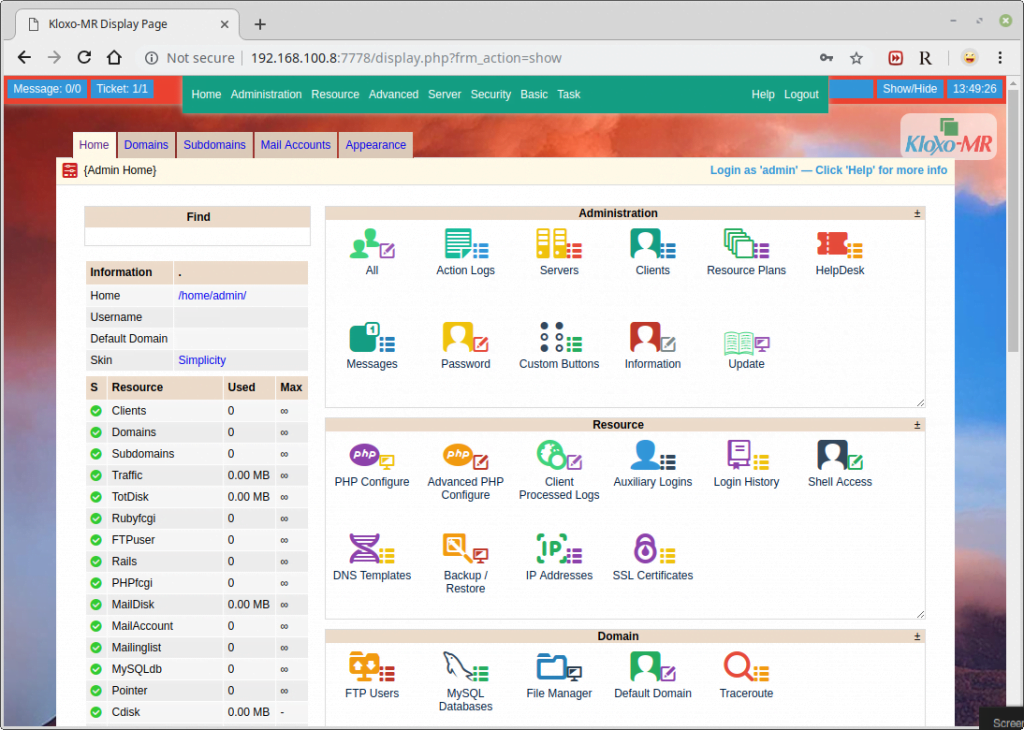
After changing the password, default panel will appear.
That’s all for now have fun! If you have any questions, use the feedback form below to reach us.