Samba is a client/server system that implements network resource sharing for Linux and other UNIX computers. With Samba, UNIX files and printers can be shared with Windows clients and vice versa. Samba supports the Session Message Block (SMB) protocol. Nearly all Windows computers include SMB support with their internal network subsystems (NetBIOS in particular).
With an appropriately-configured Samba server on Linux, Windows clients can map drives to the Linux filesystems. Likewise, the Samba client on UNIX can connect to Windows shares by their UNC name. Although differences among various operating systems (such as filesystem naming conventions, end-of-line conventions, and authentication) can limit interoperability, Samba offers a generally serviceable mechanism for resource sharing on a heterogenous network.
Install Samba on CentOS 6.0/6.1/6.2/6.3/6.4/6.5
To install the samba package,enter the following command:
# yum install samba samba-client samba-common
Check the version of installed samba software by using this command:
# smbd --version

Configure the samba service, so that, it will start automatically at boot time:
# chkconfig smb on
# chkconfig nmb on
Add these Iptables rules, so that samba will work perfectly:
# iptables -I INPUT 4 -m state --state NEW -m udp -p udp --dport 137 -j ACCEPT
# iptables -I INPUT 5 -m state --state NEW -m udp -p udp --dport 138 -j ACCEPT
# iptables -I INPUT 6 -m state --state NEW -m tcp -p tcp --dport 139 -j ACCEPT
# service iptables save
Backup the smb.conf file, then delete it and create the new one:
# cp /etc/samba/smb.conf /etc/samba/smb.conf.bak
# rm /etc/samba/smb.conf
# touch /etc/samba/smb.conf
# nano /etc/samba/smb.conf
Add these lines, in your smb.conf file (or change it according to your requirement):
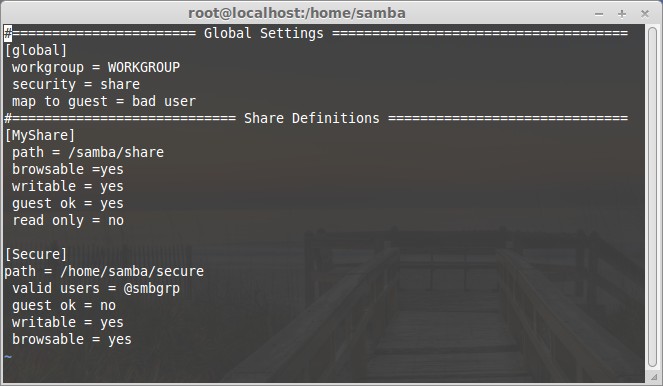
#======================= Global Settings =====================================
[global]
workgroup = WORKGROUP
security = share
map to guest = bad user
#============================ Share Definitions ==============================
[MyShare]
path = /home/samba/share
browsable =yes
writable = yes
guest ok = yes
read only = no
Save the smb.conf file and restart the service:
# service smb restart
# service nmb restart
Change permission for samba share:
# chmod -R 0777 /home/samba/share
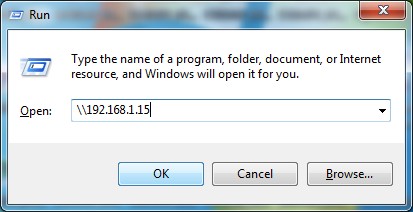
Access the samba share from windows (where 192.168.1.15 ip address of my samba server):

[ads]

Add and manage Samba users and groups
Add a group in your CentOS server:
# useradd smbuser
# groupadd smbgrp
# usermod -a -G smbgrp smbuser
# smbpasswd -a smbuser
Create a new share, set the permission on the share:
# cd /home/samba/
# mkdir secure
# chown -R smbuser:smbgrp secure/
# chmod -R 0770 secure/
Edit the smb.conf file:
# vi /etc/samba/smb.conf
Add the newly created samba share in smb.conf file:
[Secure]
path = /home/samba/secure
valid users = @smbgrp
guest ok = no
writable = yes
browsable = yes

Restart the samba service:
# service smb restart
# service nmb restart
Check the syntax error with testparm:
# testparm
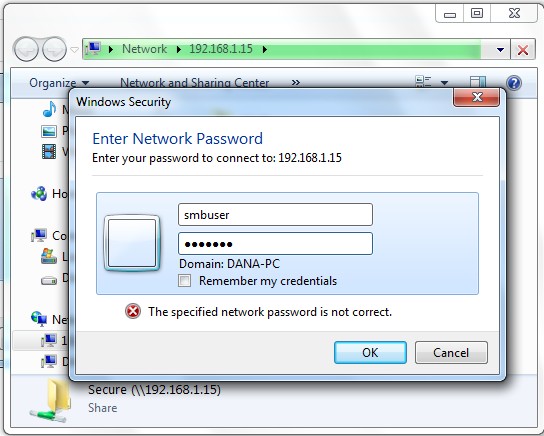
Testing from Windows Machine:

See also: How to install CentOS 6.5 minimal
Hope this will help you!
See also: Easy Samba installation on RHEL/CentOS 7
Why not use webmin?
you want a list?
For basic samba administration, it’s fine, IMO. What problems have you had?
Has anyone found a Resara replacement? Easy Samba PDC from an image with a client side gui for Windows/*nix?
yum install samba4 samba4-client samba4-common
Would be better
i have installed samba 4 but when i try to connect to share named secure
i have every access denied
how can i try ?
thanks Alberto
Hi Rasho, great post.
I’m a Linux novice, and I have created a share called Ativos, its path is /var/www/html. My environment is a Windows Server 2012 Standard domain. Using the command wbinfo I am able to get all users/groups of Windows domain, but when I try to access the created share through a Windows desktop, it returns me access denied.
In Webmin, I put a Windows valid group in the valid gropus and read/write groups fields, but still cannot access this share.
Where should I doing it wrong?
Thanks in advance.
Still get error “Windows cannot access share”?
me too. 🙁
Ich kann die Iptables Rules nicht setzten. Angeblich ist der Befehl zu lang. Was nun?
Although I can see the share in the network broswer on windows I also get error the “Windows cannot access share”
Thank you!
you might want to try this command: chcon –reference=/var /
If samba share is not allowed in selinux this wont work.. (default selinux is enforced)
This step is missing in this guide..
chcon -R -t samba_share_t /you_share_dir
Yet easy to understand excellent guide
great post.. thankyou..
It works, Thank you very much for your post .
thank you… its work
Thank you and Congratulations
in 2017 still works!
where is the ip address samba server ? wher i can find it ? or just the ip in the #ifconfig ?